Your First Solo Trip in Japan: Planning, Choosing a Destination, and Beating the Nerves
Your First Solo Trip in Japan: Planning, Choosing a Destination, and Beating the Nerves
Safety concerns, budget worries, dining alone, loneliness at night — plenty of would-be solo travelers in Japan get stuck before they even start. This guide breaks those anxieties into five manageable categories (safety, cost, loneliness, health, and trouble-shooting), then walks you through destination selection and a step-by-step preparation timeline.
Safety concerns, budget worries, dining alone, loneliness at night — plenty of would-be solo travelers in Japan get stuck before they even start. This guide breaks those anxieties into five manageable categories — safety, cost, loneliness, health, and trouble-shooting — then walks you through destination selection and a step-by-step preparation timeline so you can actually get out the door.
The real appeal of traveling solo is the freedom to move at your own pace and change plans on a whim. To make the most of that freedom, skip the gut-feeling approach and narrow your options down to three or fewer candidates using five criteria: purpose, number of days, budget, season, and safety. From there, work backward from departure day, ticking off tasks one month out, two weeks out, and the night before.
Budget anxiety tends to dissolve once you look at actual numbers. With average domestic trip spending and clear breakdowns for day trips versus overnight stays, the math is more approachable than most people assume. Rather than abandoning the idea because "it seems scary," pinpointing exactly what worries you and converting each concern into a concrete countermeasure is the most reliable way to make your first solo trip a success.
What Is a First Solo Trip? Who It Suits — and Who It Doesn't
A first solo trip is exactly what it sounds like: a trip where every decision is yours alone. Departure time, which shops to visit, how long to linger, what to eat — no compromising with a travel companion. That autonomy is the biggest draw. Spot an interesting kissaten (traditional Japanese coffee house)? Walk right in. Want to catch the sunrise? Set your alarm. Feeling drained? Drop one stop from your itinerary and head back to the hotel. JR Tokai Tours and major Japanese travel media consistently highlight this flexibility as the core value of solo travel.
On the flip side, that freedom comes with its own weight. Some people miss having someone to share a meal's first impression with. When you get lost, feel unwell, or find a shop unexpectedly closed, you are the one figuring out what comes next. I find it helpful to think of solo travel not as a "free trip" but as a "trip where you own every decision." If that framing feels exciting, you are a natural fit. If it feels heavy, starting with a shorter trip and building up gradually tends to work much better.
People Who Thrive on Solo Travel
Solo travel clicks best with people who want to follow their own curiosity. Maybe you want to visit three shrines in a row, browse half a dozen used bookstores, or have a serious lunch at a famous restaurant and keep dinner light. Those kinds of itineraries are far easier to build for one person than for a group — nobody's going to say, "I think we've seen enough temples."
Early risers and chronic detour-takers also tend to love it. Walking a quiet Japanese street at 7 a.m., catching a sunrise from an observation deck, ducking into a shop you noticed on the way back — that kind of spontaneous movement comes naturally when you are alone. On a short weekend trip especially, eliminating wait-for-the-group time directly boosts satisfaction. The more you want to pack meaning into limited hours, the more solo travel's efficiency pays off.
Walking a quiet Japanese street at 7 a.m., catching a sunrise from an observation deck, ducking into a shop you noticed on the way back — this kind of spontaneous movement is exactly where solo travel shines. If your style involves a lot of detours and early-morning outings, traveling alone feels like a natural extension of how you already move through the world.
People who enjoy chance encounters also do well. When you travel in a group, conversation tends to stay internal. Alone, you are more likely to strike up a chat with a shop owner or an inn's staff. Some of the most memorable moments on a trip come not from the sights themselves but from these small, unplanned exchanges.
If Solo Travel Feels Wrong, You Might Just Not Be Ready Yet
Struggling with solo travel does not mean you are weak — it means the current conditions and the trip format are not aligned. If walking alone at night causes serious anxiety, even a short stretch from a restaurant back to the hotel can be draining. For women traveling solo in Japan, the location of the accommodation and whether the nighttime route is well-lit are widely recognized as key factors for peace of mind. When these basics are not in place, enjoyment takes a back seat regardless of how attractive the destination is.
People who find self-managing a schedule genuinely difficult can also hit a wall fast if they pick an overstuffed itinerary for their first trip. Solo travel is free-form, but the flip side is that you handle transit, reservations, and business-hour checks yourself. Especially for first-timers, whether or not you verify restaurant hours, facility closures, and reservation requirements before departure makes a real difference in how smooth the day feels. As one popular Japanese travel-planning guide puts it, simply deciding your purpose, budget, and schedule in advance and setting priorities brings the difficulty level way down.
Loneliness is another factor. But this is not an all-or-nothing verdict. If evenings are the hardest part, you can front-load daytime activities and head back to the hotel early, pick a city with lots of dining options instead of a remote onsen (hot spring bath) town, or start with a day trip before committing to an overnight. Solo travel is less about innate aptitude and more about whether you have adjusted the format to keep the stress manageable.
💡 Tip
For your very first solo trip, just meeting three conditions — easy navigation, no long walks in the dark, and multiple dining options nearby — dramatically lowers the psychological barrier.

旅行の計画の立て方とコツとは?目的・行き先・予算の決め方をレクチャー!アプリ活用もおすすめ | びゅうトラベル(JR東日本)
旅行の計画は、目的、場所、予定、予算、持ち物の5つを決めることが大切です。この記事では、充実した旅行の計画を立てるコツを分かりやすくご紹介しています。思い出に残る旅行を計画するためにも、決め方のコツと注意点を知っておきましょう。
www.jre-travel.comBeginners Do Best with Short, Simple, Easy-to-Abort Trips
The most accessible format for a first solo trip in Japan is a day trip or a one-night, two-day outing. Day trips have the lowest psychological barrier. Based on Japan Tourism Agency data, average spending on a domestic day trip is around 19,533 yen (~$130 USD), versus 69,362 yen (~$460 USD) for a trip with an overnight stay — so the financial commitment is easy to manage as a trial run. One night, two days hits the sweet spot for actually experiencing what solo travel feels like: booking your own room, spending an evening and a morning alone. For detailed route ideas, check out our "12 Model Itineraries for a 1-Night, 2-Day Weekend Getaway" on this site.
For destination type, a city stay is the safest bet for your first time. The path from station to hotel is short, restaurants are easy to find, and course-correcting mid-trip is straightforward. Onsen towns also work well for beginners, though satisfaction hinges more on the inn itself, which means your accommodation choice needs to be more precise. Nature and scenic destinations are tempting, but weather and transportation variability raise the difficulty a notch for a debut trip.
For accommodation, if you plan to pack in sightseeing, prioritize a hotel near a station for convenience. If you want a relaxed pace, invest in the room, the bath, or the meal quality. On a first trip especially, a hotel within easy walking distance of the station in a well-lit area keeps anxiety at bay. Until you have a few trips under your belt, ease of navigation matters more for satisfaction than atmosphere.
Solo travel is not an exclusive hobby for a certain personality type. It obviously suits people who like following their own interests, but even anxiety-prone travelers can enjoy it by adjusting the trip length and location. What matters most for trip number one is not cramming in an ideal itinerary — it is designing something that lets you come home feeling, "That went well, even on my own."
Five Criteria for Choosing a Destination Without Regret: Purpose, Duration, Budget, Season, Safety
Choose by Purpose
When you cannot decide on a destination, swap the question from "where should I go?" to "what do I want to do?" That reframe makes comparison far easier. Japanese travel-planning resources commonly recommend using purpose, budget, schedule, and season as your axes, but the single most effective starting point is narrowing your main purpose down to one thing. Rest at an onsen. Wander a city on foot. Chase a specific cuisine. See a stunning view. Try a hands-on experience. Whichever one you center on changes how you pick your accommodation, how much transit matters, and how you allocate time on the ground.
If the trip is about resting at an onsen, the inn itself determines the trip's impression — not how many tourist spots you squeeze in. Baths, meals, and time in the room become the core experience, so weighting accommodation quality over station proximity keeps things coherent. Flip that for a city-walk or food-focused trip: convenience of movement beats room quality for overall satisfaction. City stays are recommended for beginners precisely because station-to-destination routes are clear, restaurant options are abundant, and plan changes are painless.
Nature and scenic trips deliver a powerful sense of escape and feel especially worthwhile solo, but they are more susceptible to weather and transit disruptions. Experience-based trips share a similar trait: activity start times and meeting points become the skeleton of the day, which means time management is more important than it appears despite the illusion of freedom. When I am stuck, I ask myself, "If only one thing can happen on this trip, what do I want it to be?" Once the main purpose is set, the things you do not need to do become visible too, and the candidate list shrinks fast.
The filtering process is straightforward. First, lock in one main purpose. Next, list three trip types that match it — onsen town for relaxation, city stay for walking and eating, nature area for scenery. Then overlay duration, budget, season, and safety onto those three candidates. This shifts your decision from "this place seems nice" to "does this place actually meet my conditions?"
Duration Compatibility
For a first solo trip, the number of days is the difficulty setting. Longer trips look more free, but in practice they pile on transit logistics, luggage management, meal planning, and stamina budgeting. The cleanest way to compare is in three buckets: day trip, one night / two days, and two nights / three days.
A day trip has the lowest psychological hurdle and is ideal for getting comfortable with the sensation of going out and coming back alone. Based on Japan Tourism Agency data, average day-trip spending is about 19,533 yen (~$130 USD), making it financially low-risk. Good fits include city walking, a famous lunch spot, cafe hopping, a day-use onsen, or a short experience activity. No overnight means no loneliness at night and no accommodation anxiety.
One night, two days is the most natural length for a first real solo trip. You travel, stay at an inn or hotel, and have time to explore the next morning — enough to taste both the appeal and the unease of solo travel without overdoing it. Great for onsen relaxation, urban food-and-stroll trips, or a seaside or highland overnight. Average spending for an overnight trip is around 69,362 yen (~$460 USD), noticeably higher than a day trip, but "time spent at the accommodation" becomes part of the trip's value.
ℹ️ Note
If duration is the sticking point, use this rule of thumb: day trip for a test run, one night for the real thing, two nights once you have some experience. Start short, build a success story, then gradually extend.
How to Think About Budget Allocation
Budgets hold together better when you set a ceiling first and allocate downward rather than adding up costs from the bottom. JTB's 2025 travel outlook puts per-person domestic trip spending at around 47,800 yen (~$320 USD), but in practice, knowing "where do I want my money to go?" matters more for planning accuracy than knowing whether you are above or below average. A clear main purpose makes the spending priority obvious.
As a starting framework, transit 25%, accommodation 40%, food 20%, experiences 15% is a workable baseline. Transit alone averages 14,022 yen (~$95 USD) according to Tourism Agency data — 26.56% of total spending — so it is genuinely the largest single category. The farther you go, the more it eats into lodging and food budgets. Evaluating "is this destination worth its transit cost in satisfaction?" tends to be more productive than asking "where do I want to go?"
For an onsen trip, pushing accommodation from 40% toward 50% makes sense. The stay itself is the purpose, so trimming food and activities slightly will not dent satisfaction much. For a city food trip, treat the hotel as a sleeping base, shift budget toward meals, and satisfaction goes up. For experience-based trips, activity fees and local transit tend to balloon, so keeping accommodation lean is the natural counterweight.
When readers ask me about budgeting, I usually suggest picking the one expense category you refuse to cut. For onsen trips, that is accommodation. For food trips, that is meals. For scenic trips, it is transportation that minimizes travel time. Spreading money evenly across everything tends to leave no single area feeling satisfying. Concentrate spending intentionally in one place and the trip develops a clear identity. Once you have three candidate destinations, overlay this allocation template and keep the ones that fit within budget.
Season, Crowds, and Backup Plans
The same destination can feel completely different — and cost completely different — depending on the season. The comparison axis worth keeping in mind is not "when is peak season?" but "do this season's crowds and prices align with my purpose?" The most photogenic window is usually the most expensive and crowded. For a first solo trip, shifting slightly before or after peak often makes things smoother.
Weekdays tend to be cheaper and less crowded, which suits beginners well. Weekends and national holidays mean packed trains and fully booked inns, and for someone still finding their solo-travel legs, exhaustion can set in before the fun does. JTB's 2025 outlook counts nine three-day-or-longer holiday windows, with summer potentially stretching to nine consecutive days depending on how you arrange leave — but these travel-friendly periods also concentrate bookings, so planning around them rather than into them tends to work better.
The seasonal factor people overlook most is not temperature but weather risk. Nature and scenic trips rely on clear skies; rain or wind can reshape the experience entirely. City stays, by contrast, absorb bad weather well — museums, cafes, and shopping complexes make solid fallback options. Onsen trips are similarly resilient once you have made it to the inn.
A useful technique after narrowing to three candidates: assign each one a role — "first choice," "weather-proof option," and "budget-friendly option." First choice is the destination you most want to visit, the weather-proof option centers on city walking or inn-based relaxation, and the budget-friendly option uses dates slightly off-peak. This turns vague indecision into a comparison of priorities.
Safety Evaluation Points
On a solo trip, route safety matters as much as the destination's appeal. Especially the first time out, what counts is not whether a place is famous but whether the walk back to the hotel is straightforward and whether night travel is avoidable. The principle that women solo travelers should prioritize accommodation location and nighttime route visibility for security is widely accepted in Japan, but it applies just as strongly to all first-time solo travelers regardless of gender.
Station proximity alone does not guarantee comfort. A hotel near the station that requires walking through a dim underpass or an empty side street still feels uneasy. What you actually want to check: Can I walk from the station to the hotel on a well-lit road? Is there foot traffic? Is the area lively without being rowdy? In cities, "convenient but not right in the middle of the entertainment district" is the sweet spot. In onsen towns and nature areas, shuttle availability and whether you need to venture out after check-in are practical comparison points.
Safety decisions sharpen when you turn feelings into a checklist. When comparing candidates, running through these items catches gaps:
- Is the accommodation reachable from the station or main transit hub without difficulty?
- Is the route to the hotel well-lit with pedestrian traffic?
- Does the schedule avoid long nighttime walks after arrival or dinner?
- Does the plan assume solo movement late at night or very early morning?
- Are there at least a convenience store and a few restaurants near the hotel?
- Is the itinerary forgiving enough to accommodate feeling unwell?
Behavior on the ground also makes a difference. Avoid broadcasting that you are alone, skip real-time location-tagged social media posts, and do not overload evening plans. None of this is dramatic — but for a first solo trip, these small choices add up. If international travel is on your radar, the Ministry of Foreign Affairs' Overseas Safety website is useful less as general reading and more as a filter: can you build a route that avoids high-crime areas and minimizes nighttime exposure?
In terms of reducing indecision, safety works the same as every other criterion: swap "I'm scared so I won't go" for "I'll keep candidates where nighttime movement is short." When you look at all five axes — purpose, duration, budget, season, safety — almost no destination scores perfectly on every one. But finding a place that matches your main purpose, keeps night-time stress low, and fits the budget is very doable. Narrow to three or fewer candidates on that basis and destination selection becomes concrete.

外務省 海外安全ホームページ
海外に渡航・滞在される方々が自分自身で安全を確保していただくための参考情報を公開しております。
www.anzen.mofa.go.jpComparing Solo Trip Styles for First-Timers in Japan
Rather than starting with a city name, thinking about what kind of experience works well solo leads to fewer first-time mistakes. Beginners in particular find that satisfaction depends less on the number of attractions and more on how easy it is to navigate, how comfortable dining alone feels, and how pleasant the solitary hours are. The right format for someone seeking quiet differs from the right format for a food-focused traveler, and both differ from what works for someone anxious about getting around.
As a rough guide, onsen towns and city stays rank highest for beginner-friendliness. The former makes time at the inn the trip's centerpiece; the latter offers predictable station-area navigation and abundant dining options. Temple-and-walking trips pair well with a taste for quiet, and nature/scenic trips deliver a strong mental reset — but both require more careful logistical preparation. Experience-based trips fill your schedule naturally, which helps if your main worry is "will I know what to do with myself?"
ℹ️ Note
If you want quiet, go with an onsen town or a temple-and-walking route. If food is the priority, a city stay wins. If transit worries you, a station-adjacent city stay or an all-inclusive onsen inn is easiest to handle. Nature and scenic trips are compelling, but satisfaction is often higher on your second or third solo trip than your first.
Solo Trip to an Onsen Town
The strength of an onsen town solo trip is that satisfaction starts the moment you arrive at the inn. A property with a large communal bath, a comfortable room, good meals, a lounge, and a post-bath relaxation area can deliver a "this was worth it" feeling without packing the schedule with sightseeing. The low movement requirement and the lack of pressure to wander outside after check-in make it a calm format even for a debut solo trip. If you are considering a day-use onsen or a short bath-hopping route, our "8 Best Day-Trip Onsen with Scenic Open-Air Baths" article is also worth a look.
The match with quiet-seekers is excellent. Soaking on your own schedule, reading in your room, and having meals as the only gentle punctuation to the day — that rhythm eases the tension a first solo trip can carry. In my experience, the less you need to "do something," the higher your onsen-town satisfaction climbs. Meals that come with the stay also eliminate the stress of hunting for restaurants, another beginner-friendly feature.
On the other hand, if you are the type who wants to compare multiple restaurants in town, an onsen stay can feel monotonous. A dinner-and-breakfast plan is convenient, but it is a fundamentally different pleasure from hopping between eateries. Also, some onsen inns in Japan do not accept single-guest bookings, so available options can vary even within the same area. For this trip style, pick the inn first — focusing on bath, food, and room quality — and build outward from there.
City Stay Solo Trip
A city stay is the easiest format to recommend as a first solo trip. Base yourself at a hotel near a major station and mix museums, cafes, department stores, bookshops, night views, and regional specialties however the day's mood dictates. Trains and buses are well-signposted, and recovering from a wrong turn is straightforward, making this the most navigable format for transit-anxious travelers.
Food-focused travelers benefit the most. A morning kissaten, a famous lunch set, a solo-friendly izakaya or teishoku (set-meal) restaurant at night — the options are wide and the barrier to entry is low. Even if eating alone still feels a little daunting, station buildings, department-store basements, and casual spots near the hotel mean you are unlikely to go hungry.
That said, not every city works equally well. First-timers tend to do best with a location close to a major terminal but not dead-center in the entertainment district. Near the station yet slightly offset from the late-night bar strips balances convenience with calm. Quiet-seekers actually do well with this "slightly off-center city stay" formula too: enjoy the streets by day, retreat to a peaceful hotel at night. If crowds drain you quickly, choosing a city where both sightseeing and meals can happen within one station's radius keeps energy expenditure low.
Temple, Shrine, and Town-Walking Solo Trip
The draw of a temple-and-walking trip is how well it preserves your own rhythm. In a group, you match walking speed and pause duration to others. Alone, you can linger in an alley, peek into a tiny shop, or sit quietly in a temple compound for as long as you like. This format suits people who prefer absorbing atmosphere and architectural detail over high-energy entertainment.
Quiet-seekers will find strong compatibility here. Early-morning temples and tourist areas — before tour groups arrive — have a clarity that turns walking itself into a purpose. A morning-first, wrap-up-by-early-afternoon structure works naturally and produces satisfaction without adding evening plans. Compared to a city stay, restaurant density may be lower, but small pleasures — a kissaten, a traditional sweets shop, a neighborhood diner — weave in easily.
For this trip style, comfortable shoes and a compact crossbody bag matter more than fancy gear. Stone paths at shrines, slopes, and narrow lanes are harder on your feet than they look, and bulky luggage kills the impulse to detour. It is not the strongest format for food-first travelers, but for anyone who wants a blend of scenery and light street-food grazing, the balance is right. Even navigation-anxious travelers can handle it by limiting themselves to a single walkable area rather than bouncing between scattered landmarks.
Nature and Scenic Solo Trip
Nature and scenic trips excel at resetting your headspace. When the ocean, a lake, highlands, a gorge, or a viewpoint is the destination, even a short stay produces a strong sense of departure from daily life. For moments when you need distance from your routine, these trips tend to create more lasting memories than a city visit.
Beginner-friendliness, however, drops a level. The reason is clear: weather and transit are bigger variables. Overcast skies or rain can reshape the experience, and when the trip's success rides on infrequent buses or rural train lines, the planning burden grows. For transit-anxious travelers, the first solo trip is smoother with a viewpoint close to a station, an inn with shuttle service, or nearby alternatives like a museum or cafe in case the weather turns.
Quiet-seekers will find a fit, though the quality of quiet differs from an onsen or a temple walk. If onsen quiet is "cocooning," and temple quiet is "walking meditation," scenic quiet is "stillness facing outward." When conditions align, satisfaction peaks. But for food-focused travelers this format is a lower priority. If your main driver is cuisine, pick a city; if it is rest, pick an onsen; if you want a mental reset through landscape, pick nature. For schedules without spare days, having an indoor fallback option nearby keeps things realistic.
Experience-Based Solo Trip
Experience-based solo trips — pottery workshops, Zen meditation, sutra copying, cooking classes, guided tours, light outdoor activities — are structured around a reservation that anchors the day. This directly addresses the common first-timer worry of "what if I run out of things to do?" or "what if time drags?" Having one committed block gives the day shape.
This format works especially well for people who feel uneasy with open time. A single booked activity naturally generates a before-and-after rhythm: transit to the venue, lunch, a cafe break — the sequence builds itself. I generally advise first-time solo travelers not to over-schedule, but for people who feel adrift with a completely empty day, one reservation stabilizes the entire trip. Quiet experiences like Zen sitting or sutra copying fit contemplative travelers, while cooking or craft workshops leave you with a physical souvenir of the trip.
The thing to watch is less the experience itself and more the transit logistics working backward from start time. In a city this is rarely an issue, but a countryside workshop or a nature-area activity can make getting to the meeting point the real challenge of the day. Food-focused travelers may find that activity timing overlaps with prime lunch or dinner windows, limiting restaurant flexibility. On the plus side, having a fixed block eliminates the drain of aimless deliberation. If you want to come home having done something rather than just looked at things, this is the format.
Full Preparation Timeline: One Month to the Night Before
One Month Out: Lock In Purpose, Duration, and Budget
Preparation holds together best when you settle the trip's skeleton before shopping for hotels and trains. The three things to pin down first: why you are going, how many days you have, and how much you are comfortable spending. Whether the goal is soaking in an onsen, walking a city and eating well, or resetting your mood with a view changes the destination, the travel distance, and everything downstream. Leaving the purpose vague while casting a wide net on destinations just multiplies research without bringing you closer to a decision.
For duration, look beyond work or school calendars and factor in how much time you can realistically spend in transit. JTB's 2025 travel outlook notes nine holiday windows of three or more consecutive days, with summer potentially stretching to nine straight days depending on how you arrange leave. Still, for a first solo trip, using every available day is less stable than picking a duration where transit and on-the-ground time stay balanced. Even the difference between leaving Friday night and Saturday morning changes how tired you are on arrival, so marking your realistic departure window — not just your days off — makes the plan more honest.
Budget-wise, a rough ceiling is more useful at this stage than a precise figure. Without a cap, both transit and accommodation quality creep upward and the total balloons. Using the allocation framework already discussed, even just deciding "this trip spends on accommodation, not transit" or vice versa changes what the candidate list looks like. JTB's 2025 estimate puts per-person domestic travel spending at 47,800 yen (~$320 USD), and Tourism Agency data shows transit taking a large share of total expenditure. Choosing a distant destination usually means trimming lodging or meals; staying closer frees budget for food and experiences.
For the destination itself, resist the urge to decide on one place immediately. Narrowing to three candidates is the right resolution at this point. Something like "an easy-to-navigate city," "an onsen town for rest," and "a nature area that shines in good weather" — three options with different personalities. This lets you compare room availability, transit cost, and weather forecasts side by side and adjust as information comes in. JRE Travel's planning content takes a similar approach, recommending that you sort by purpose, then duration, then budget. In my experience, holding three options prevents the "I just cannot pick" paralysis.
Two to Three Weeks Out: Secure Transit and Accommodation, Check Reservation Requirements
Once your candidates are set, lock down transportation and lodging first. Before lining up restaurants and sightseeing details, knowing how you get there and where you sleep removes a huge chunk of ambient anxiety. For transit mode — shinkansen (bullet train), limited express, flight, highway bus — evaluate not just cost but arrival time and transfer simplicity. On a first solo trip, the route that is "hard to get wrong" and "easy to recover from delays" beats the cheapest option for satisfaction.
For accommodation, location usability outweighs room aesthetics. Can you walk from the station? Does the route avoid dark, low-traffic streets? Can you check in comfortably if you arrive late? Those three questions cut through most of the noise. In an onsen town, shuttle availability matters; in a city, being slightly offset from the main nightlife strip matters; in a nature area, whether you can start the next morning's movement easily matters. For solo travelers, "not getting lost on arrival" is worth more than luxury.
The detail people miss at this stage is checking business hours, closing days, and reservation requirements. Tourist-area cafes sometimes close early on weekdays, popular lunch spots may require reservations even for one person, and museums can have unexpected closure days. Solo travel makes spontaneous rerouting easy in theory, but you are also the only person generating alternatives when something falls through. Confirming operating details for your top two or three stops prevents the day from stalling. Experience venues, observation decks, ropeways, day-use baths, and popular lunch spots are the ones where reservation status most affects your plan.
At this stage I do not build a minute-by-minute itinerary. Instead, I sketch one activity for the morning, one for the afternoon, and two restaurant candidates. That is enough to know which hours to verify and still leaves room to adapt if transit runs late. Especially early in your solo-travel career, under-scheduling produces better outcomes than over-scheduling.
One Week Out: Packing, Emergency Contacts, Health Management
One week before departure, shift focus from planning to practical preparation. The easiest win is creating a packing list. Beyond clothes and toiletries, items like tickets, ID, a charger, regular medication, earbuds, and a compact umbrella — the "quietly annoying if forgotten" category — are worth listing out so you are not scrambling the night before. JAL's packing checklist, for example, separates essentials from nice-to-haves, and that two-tier structure helps.
Reservations that need lead time should also be handled now. The core experience, a sought-after lunch slot, or a time-ticketed museum entry are all easier to secure a week out than at the last minute. Solo travelers tend to assume they can walk in anywhere, but small-capacity restaurants and limited-slot workshops sometimes require bookings even for a party of one. Reserve the trip's anchor activities and leave the rest flexible.
For emergencies, do not keep all your critical information locked inside your phone. If the device is lost, stolen, or dead, you need a fallback. Beyond Japan's standard emergency numbers (110 for police, 119 for fire/ambulance), write down a family member or friend's contact, the hotel's phone number, and the lost-card hotline for whichever credit card you carry. Card company hotlines are issuer-specific, not brand-specific, so gather the right number for your actual card before you leave. If international travel is in scope, JCB operates a 24/7 lost-and-stolen desk, and Visa has international assistance lines as well.
Health management during this final week is itself trip preparation. Leaving sleep-deprived on departure day means transit alone can wipe you out. If you have a known weak spot — headaches, stomach issues, fatigue — packing your regular medication early removes one more thing to worry about. A JR Group travel media article aimed at first-timers makes the same point: for beginners, not getting sick is what separates a good trip from a mediocre one. I have found that prioritizing sleep the week before departure does more for trip satisfaction than any amount of itinerary optimization.
ℹ️ Note
Avoid going all-cash or all-card. Cities in Japan run smoothly on cards, but rural station kiosks, independent shops, day-use bath facilities, and coin lockers often require cash. Conversely, relying only on cash leaves you exposed if you need to extend a stay or change transit plans on the fly.
国内旅行の持ち物9つの必須チェックリスト|後悔しない旅準備 | SKYWARD+ スカイワードプラス
国内旅行に「これだけ持っていけばまずは安心」の持ち物15に加え、あると旅が快適になるグッズ40種を、機内誌『SKYWARD』編集部がお伝えする。お好みと旅先に合わせて持ち物をチョイスし、安心・快適なご旅行を!
skywardplus.jal.co.jpThe Night Before and Morning Of: Final Checks
The night before is not for gathering new information — it is for confirming and tidying what you already have. Start with weather and transit status. For trips involving nature areas or rural rail lines, rain or wind can reshape both your outfit and your departure timing, so leave room to adjust. Even on a city trip, a rain forecast changes your shoe and bag choices. Rather than overhauling the destination at this point, having one backup plan ready is more practical.
On the money side, balance cash and card holdings. A stack of crisp large bills is less useful on the ground than a mix of smaller denominations. Carrying a secondary payment method separate from your main card reduces the damage if one goes missing. If you rely heavily on mobile payments, mixing in a method that does not depend on connectivity or battery life adds resilience.
A note on portable chargers: pay attention to the unit on the capacity label. As a rough guide, Wh = mAh x V / 1000 (typically using 3.7V), so a 10,000 mAh battery is approximately 37 Wh. Actual charge cycles depend on charge-discharge efficiency (realistically 60-70%), so treat estimates as ballpark figures. If the product lists Wh directly, use that number.
On departure morning, the goal is not adding items but confirming essentials are where they belong. ID, payment methods, tickets, phone, regular medication, charging cable, portable charger — if these are accounted for, nothing critical is missing. Anything you need immediately upon arrival — wallet, phone, transit pass, handkerchief, medication — goes in the top layer of your bag so you are not digging through everything at the station or airport. A smooth first ten minutes sets the tone for the rest of the day.
Additional Preparation for International Trips
If you are heading abroad, domestic preparation gains an extra layer: entry requirements and safety research. The most important item is passport validity. Japan's Ministry of Foreign Affairs notes that many countries require three to six months of remaining validity, and even confirmed flights and hotels will not help if your passport falls short. Checking visa requirements and entry documentation at the same time you finalize your itinerary keeps the process from stalling later.
For safety, the Ministry of Foreign Affairs' Overseas Safety website provides a situational overview, and registering with Tabireji (the ministry's traveler registration service) delivers destination-specific alerts and emergency contact access. Since solo travel means handling judgment calls alone, having nighttime-movement and neighborhood-selection information before departure makes a tangible difference. If you plan to rely on credit card travel insurance, sorting out whether coverage is automatic or conditional on purchasing travel expenses with that card avoids confusion when it matters.
For flights, international convention (IATA-based) treats batteries under 100 Wh as straightforward, 100-160 Wh as restricted (typically requiring approval and quantity limits), and above 160 Wh as prohibited in carry-on. However, specific declaration procedures and quantity limits vary by airline and route, so always check your carrier's official baggage policy before departure.
Arriving at the airport two to three hours before departure is a widely recommended guideline, as noted by travel agencies like Tabikobo. International flights stack check-in, security screening, immigration, and the walk to the gate, which burns more time than domestic travelers expect. For local currency, carrying enough cash for immediate transit and a snack upon arrival while keeping card payments as the default strikes a practical balance. Even more than on domestic trips, separating the roles of cash and card makes recovery easier if something goes wrong with one or the other.
Concrete Strategies for Beating Solo-Travel Anxiety
Loneliness and Filling the Gaps
Solo-travel anxiety usually starts not with "what if something dangerous happens?" but with "what if I have nothing to do?" Willpower does not fix this — schedule design does. The key is not cramming in tourist sites but building in experiences, cafe time, and a morning walk from the start.
A late-morning tour or onsen visit, an afternoon cafe stop, a walk around the hotel the next morning — this kind of sequence keeps dead air from swallowing you. Short, bounded activities work best: pottery, a ropeway ride, a day-use bath, a walking tour. Cafe time, too, is not just a break — treat it as a slot for sorting photos, jotting notes, or reviewing the map, and time alone stops feeling empty.
Morning walks are especially effective. Even a short stroll before checkout lets you absorb the local atmosphere at your own pace, and it tends to generate that "I'm glad I came alone" feeling. Fewer people around means a calmer view, and any residual loneliness from the previous night rarely survives into a fresh morning.
How you use social media also affects your mood. If posting becomes the main activity, you end up spending more time looking at a screen than at the scenery. On a solo trip, keeping social media closer to consumption than broadcasting tends to be the right balance. Prioritizing "am I actually enjoying this moment?" over documentation makes loneliness fade.
A Dining Strategy That Works for One
First-time solo travelers stumble more often on meals than on sightseeing. Hesitating outside a restaurant or ending up with nowhere to eat at dinner amplifies anxiety fast. Confidence is less useful here than choosing restaurant formats that are naturally solo-friendly.
The easiest wins: popular lunch spots, counter-seat restaurants, and food halls. Even well-known restaurants absorb solo diners easily at lunch, and set meals give the visit a clear tempo. Sushi bars, ramen shops, udon joints, bistros, and standing-style diners all have counter-centric layouts where a single guest fits right in. Station-building and department-store food halls also work — solo diners are the norm there, so blending in is effortless.
If dinner triggers the most stress, designing the day so you do not "compete" at dinner is a valid strategy. Make lunch the trip's main meal event, then handle dinner with takeout from a depachika (department-store basement food hall), an ekianaka (in-station shop), or a simple spot near the hotel. In onsen towns and smaller cities, eating the regional specialty at lunch and spending the evening quietly at the inn often produces higher satisfaction than a nerve-wracking dinner hunt.
💡 Tip
Decide in advance when you will eat the destination's signature dish. Assigning the highlight to lunch and letting dinner be low-pressure cuts decision fatigue dramatically.
Seat format matters too. Counter seating or a small restaurant that is not set up for large groups tends to feel more comfortable for a solo diner than a room full of four-tops. Being able to glimpse the interior from outside helps gauge the vibe and lowers the tension of walking in. Personally, I find that "time spent searching for dinner" is the single most tiring part of a first visit to an unfamiliar place, so locking in a candidate during the afternoon keeps the evening relaxed.
Security Tips for Women Traveling Solo
For women traveling alone in Japan, accommodation choice and nighttime route design carry more weight than the destination itself. Station proximity is not enough on its own — check whether the walk to the hotel is well-lit, whether there is foot traffic, and whether the area is not so deep in the entertainment district that it feels unsettling. Having a convenience store nearby, access from a main road, and no narrow back alleys to navigate late at night are unglamorous criteria, but they work.
At check-in and inside the property, keeping your room number private is a small habit with outsized impact. Ask the front desk not to say it aloud, avoid displaying your room key in the elevator, and do not linger in the hallway outside your door. Once inside, immediately check the door lock, secondary latch, and peephole.
On the ground, conversations happen naturally — but volunteering "I'm traveling alone" is unnecessary. When chatting with a shop owner or a fellow passenger, there is no need to share your schedule or hotel location in detail. Friendly engagement without specifics is enough.
Clothing and accessories also play a role. A crossbody bag you can keep in front of your body and a load light enough to keep one hand free are more travel-practical than a visually striking handbag. Security is less about one dramatic precaution and more about consistently limiting how much location, possession, and accommodation information you broadcast.
Nighttime Behavior and Social Media Discipline
On a solo trip, daytime miscalculations rarely cause real problems — nighttime carelessness is where risk concentrates. Erring on the side of less late-night solo activity is about right, especially in unfamiliar territory. "Eat dinner, then head toward the hotel" is a stable evening rhythm for a first visit. Centering a trip around night views, bars, or late walks multiplies both route complexity and decision fatigue.
Setting an early return time creates breathing room. Errands like a convenience store or drugstore run are better handled by late afternoon so they do not become reasons to walk around after dark. Even in well-lit urban areas, the few minutes between the station and the hotel can feel different at night, so building a no-detour route home is practical advice.
Social media deserves a security-specific rethink. Avoiding real-time posting is the simplest upgrade — it keeps your current location, continued presence at a spot, and proximity to your hotel from becoming public information. Photos showing a hotel name, a room key with a visible number, or a window view that narrows down the building are better saved for later. Posting after you have moved on or after you are home is more compatible with solo travel's safety profile.
Think of solo-trip social media as separating "recording" from "broadcasting your location." Capturing a good experience and telling the world exactly where you are right now are two different things. Travel-high lowers the posting threshold, but the information you share in the moment is more specific than it feels.
Emergency Contacts and Insurance Thinking
The most practical way to reduce anxiety is having "who do I contact if something goes wrong?" sorted before departure. Within Japan, police is 110 and fire/ambulance is 119 — no ambiguity. On top of that, your credit card issuer's lost/stolen hotline and your travel insurance emergency number, stored not only on your phone but also on paper, prevent a dead-device scenario from becoming a dead end.
If you lose a card, the standard sequence is to call and freeze it immediately. Visa and JCB both publish international assistance contacts, but the number you actually call to freeze the card is your issuing bank's, not the brand's. Under stress in an unfamiliar place, search accuracy drops, so compiling these numbers once before departure saves time when it counts. If you lose an entire wallet, the order — freeze cards, file a police report if needed, figure out transit and lodging with remaining resources — keeps things from spiraling.
Insurance is worth reviewing not just for coverage existence but for what exactly is covered. For international travel, treatment/rescue costs, personal belongings damage, and liability are the three most relevant axes. If you are counting on credit card travel insurance, the automatic-versus-conditional distinction changes the premise: does coverage activate just by holding the card, or must you have purchased the trip with it? Getting that wrong means your assumed safety net may not exist.
Even domestic trips have cancellation risk — illness, transit disruption, a last-minute schedule change. For trips where accommodation costs are significant or the itinerary is tightly booked, cancellation coverage in a travel insurance policy can be worth the premium. Insurance is less about buying peace of mind and more about deciding how much out-of-pocket recovery cost you are willing to absorb.
Extra Considerations for International Trips
Overseas solo travel requires dropping the assumption that things work the same way they do in Japan. The first priorities are local emergency numbers and the Japanese embassy or consulate contact. In a crisis, the local emergency line is usually the fastest resource, with the diplomatic mission as the next layer of support. Registering with the Ministry of Foreign Affairs' Tabireji service gives you access to safety updates and emergency notifications for your destination, which helps you stay oriented even when conditions shift.
Passport management is in a category of its own. Losing it abroad has far larger consequences than losing domestic ID — your ability to move at all can freeze. Keep the physical document secure as the top priority, and carry a copy of the photo page plus backup copies of reservations separately. Whether you use the hotel safe or keep it on your person depends on the day's plan, but the rule is: always be able to answer instantly where your passport is.
For transit, do not push yourself on arrival night. Use a transport option with transparent pricing from the airport, and if you arrive late, stay near the airport or in an area with simple access. Fatigue and information overload are both higher than on a domestic trip, so the more you pack into day one, the faster your judgment degrades.
International travel insurance with personal belongings, medical/rescue, and liability coverage shapes how secure the trip feels. Phone theft, suitcase damage, a clinic visit, needing someone to accompany you — the scenarios that actually cause trouble are more about daily-life infrastructure than about sightseeing. Without a travel companion to fall back on, having your emergency contacts, coverage details, and local support resources connected in your head is what creates real preparedness.
Budget Benchmarks and Money-Saving Tactics in Japan
Average Domestic Costs: Day Trip vs. Overnight
When getting a feel for budget, use averages the way you would use a map — as orientation, not gospel. JTB's 2025 travel outlook puts per-person domestic trip spending at 47,800 yen (~$320 USD). Meanwhile, a Rakuten Card article synthesizing Tourism Agency data places 2024 per-person per-trip domestic spending at 46,585 yen (~$310 USD). The two figures are remarkably close, making "roughly upper 40,000-yen range" a useful baseline for domestic solo travel in Japan.
That said, the average alone can mislead. The gap between day trips and overnights is steep. The same Tourism Agency data shows overnight trips at 69,362 yen (~$460 USD) and day trips at 19,533 yen (~$130 USD) — same country, vastly different price points. First-timers struggling to set a budget will get a sharper picture by asking "am I doing a day trip or staying overnight?" than by looking at the blended average.
Intuitively, day trips revolve around transit and food costs. The moment you add accommodation, the total jumps a full tier. One night / two days is the natural first-timer format, but it is meaningfully more expensive than a day trip. Flip that around: if you want the lightest possible first step, a day trip keeps things financially gentle. If you want the full solo-travel experience, one night / two days is the format — just budget accordingly.
Expense Breakdown and Allocation Logic
The line item that stands out in the data is transit. Tourism Agency figures put average transit spending at 14,022 yen (~$95 USD), or 26.56% of total trip cost. More than a quarter of the budget goes to getting there and back, which means whether a trip feels expensive often depends more on distance than on what you do once you arrive.
The point is not to replicate average splits but to tilt them toward your trip type. An onsen trip where the inn is the point benefits from a higher accommodation share. A city stay built around food should lean into the meal budget and treat the hotel as a sleeping base. A nature or scenic trip tends to inflate access costs, so trimming dining and shopping keeps the total from running away.
When I think about budgeting, I set the total first, then decide where satisfaction will come from. A trip that spends on transit to reach somewhere far feels different from a trip that stays close and invests in lodging and food — even at the same total price. The instinct to cut accommodation first is common, but given how large transit's share actually is, adjusting destination distance is often more effective than shaving hotel costs.
Saving Tips and Booking Timing
The savings lever with the biggest payoff is not scrimping at the destination — it is choosing when you leave. Weekday departures tend to be cheaper and less crowded. Solo travelers have a natural scheduling advantage here, and converting that flexibility directly into cost savings is one of the format's underrated perks.
Shifting slightly off peak season is equally powerful. Cherry blossom peak, autumn color peak, dead-center Golden Week — these windows come with premium pricing and maximum crowds. Moving your dates just before or just after the surge preserves most of the experience at a noticeably lower cost. With nine three-day-plus holiday windows in 2025, targeting the edges rather than the centers tends to yield better value.
On the booking side, early-bird discounts and multi-ride passes add up, especially on trips with several transit legs. Basing yourself at a station-adjacent hotel reduces supplementary taxi, bus, and local train expenses — and sometimes a "slightly pricier but near the station" hotel costs less in total than a "cheap but far" one once you add local transit.
Food savings work best as allocation shifts rather than quality cuts. Chasing the destination's star meal at lunch instead of dinner is the simplest move — lunch pricing is milder at many restaurants, and keeping dinner light or informal prevents the overall food budget from spiking. For solo travel specifically, "one serious lunch per day" holds the budget steadier than "expensive dinner every night."
ℹ️ Note
Budget-conscious solo trips in Japan come together most easily when you combine three things: weekday departure, dates slightly off peak, and a station-adjacent base. Saving at the destination is less effective — and less enjoyable — than saving through scheduling and location.
Budget Frames by Duration
For actual planning, having a framework beyond averages makes decision-making faster. For first-time solo trips in Japan, splitting by day trip / one night / two nights keeps things clean. The table below uses the averages and transit ratios already discussed as a rough scaffold.
| Duration | Budget Ballpark | Allocation Notes | Natural Fit |
|---|---|---|---|
| Day trip | Around 19,533 yen (~$130 USD) | Transit and food dominate. Adding one experience activity boosts satisfaction easily | City walking, a famous lunch, cafe hopping, day-use onsen |
| 1 night, 2 days | Designable in the 46,585-69,362 yen range (~$310-460 USD) | Three pillars: transit, lodging, food. Decide early whether to weight lodging or transit | Onsen town, city stay, seaside or highland overnight |
| 2 nights, 3 days | Likely above 69,362 yen (~$460 USD) | Keep transit share in check by not over-routing. Staying at one base reduces movement costs | Regional multi-stop, rural city extended stay |
When using this frame, further sub-allocating helps translate numbers into action:
- Day trip: Build around transit, make food the highlight
- 1 night, 2 days: Decide up front whether accommodation satisfaction or sightseeing volume is the priority
- 2 nights, 3 days: Resist adding transit legs; staying at one base and exploring locally keeps transport costs from ballooning
Solo-travel budgeting is not a binary choice between luxury and austerity. Stay nearby and upgrade the inn, travel far and shift meals to lunch, dodge peak dates and get more for the same money — the adjustments available to a solo traveler are unusually flexible. Knowing the benchmarks lets you gauge whether a specific plan is "expensive for what it is" or "reasonable for the experience."
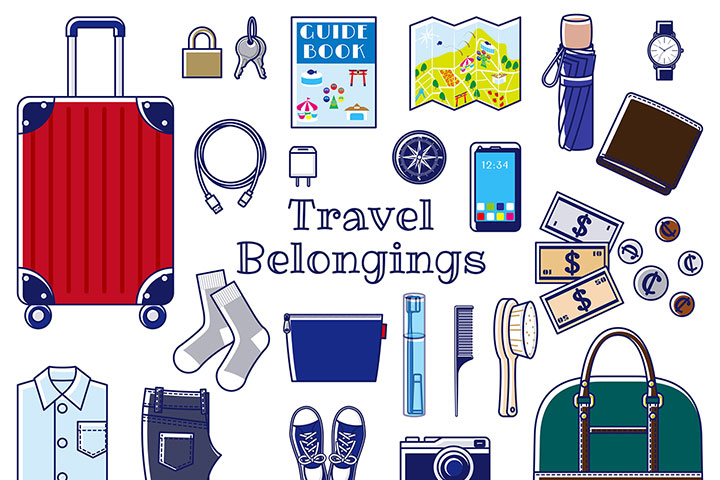
First Solo Trip Checklist
Pre-trip preparation is less about what you pack and more about whether you have eliminated day-of confusion. For a first solo trip, aiming for zero forgotten items is less practical than locking down the items that would actually derail things. I find that splitting gear into essentials, nice-to-haves, morning-of checks, information to share, and emergency notes makes the whole process lighter.
Essentials
The non-negotiables are proof of identity, payment methods, transit information, and a way to communicate. If these are covered, most other oversights are recoverable.
Pack at minimum:
- Photo ID (driver's license, My Number card, student ID, etc.)
- Cash
- Credit or debit card
- Transit tickets, reservation confirmations, boarding passes
- Smartphone
- Charger (phone cable plus one backup; pair with a portable battery)
- Regular medication
- Health insurance card
- A note with emergency contact numbers
The critical principle: do not consolidate everything onto your phone. Hotel reservation, transit tickets, family contact info — if all of it lives only on your device, a dead battery or a lost phone takes everything offline at once. Write the hotel address and phone number, return trip details, and a family member's number on a single piece of paper and carry it separately.
Medication is another commonly overlooked item. Beyond over-the-counter headache or stomach pills, anyone on prescription medication should prioritize those above all else. An insurance card ideally goes unused, but carrying it removes one more source of hesitation if something goes wrong.
Nice-to-Haves
These are not critical but smooth out the small friction points of transit and waiting. First-time solo travelers are often more fatigued by the in-between moments — commutes, layovers, queues — than by the sightseeing itself, so these items earn their space.
Useful additions:
- Compact umbrella
- Portable battery
- Earplugs
- Eye mask
- Compression bags
- Small crossbody bag
- Hand warmers (cold-season trips)
Portable batteries deserve a specific note. A standard 10,000 mAh unit is roughly 37 Wh at 3.7V, but real-world capacity and charge cycles depend on the specific product and charge-discharge efficiency. If international flights are a possibility, check the product's Wh rating and your airline's carry-on battery policy before packing.
Morning-of Checks
Departure morning is for verifying positions, not adding inventory. Keeping the check short prevents last-minute panic.
The five things I actually look at:
- Weather and transit service status
- Whether tickets and reservation screens are ready to pull up
- Phone and portable battery charge levels
- Location of wallet, phone, and keys
- House keys, stove, locks
The most impactful habit: fix where each valuable item lives. Wallet in the bag's inner pocket, phone in the front pocket, keys in a zippered compartment — set positions so you never waste time searching mid-transit. First-time solo travelers tend to feel the most nervous not at the destination but at the departure station or airport, and this "assigned spot" system directly reduces that friction.
💡 Tip
Morning checks flow better when split into stages: weather and transit status after waking, charge levels before breakfast, wallet-keys-phone positions right before walking out the door.
Information to Share with Family
Solo travel means certain information needs to exist beyond your own head. If contact becomes difficult, having details a family member can trace makes a difference — both practically and in how much they worry.
Share these basics:
- Destination
- Hotel name, address, and phone number
- Flight or train details
- A rough itinerary
- Emergency contacts
The key is keeping it rough. "Lunch near the station, moving to the hotel by evening" and "sightseeing in the morning on day two, heading home in the afternoon" is detailed enough. The purpose is not surveillance — it is leaving a thread someone can pull if needed.
For international solo trips, add the local contact layer: hotel details plus flight number, any local phone number you will use, insurance company hotline, and the Japanese embassy or consulate for your destination.
Emergency Notes
In a genuine emergency, searching on your phone gets harder, not easier. Stress scrambles recall — hotel names and phone numbers vanish from memory. A quick-reference list on paper or in a notes app that you can access without searching is the fix.
Include domestically: 110 and 119, your card issuer's lost/stolen line, your insurance company's emergency number, the hotel phone number, and the nearest police box or hospital. For credit cards, note the issuing bank's hotline, not just the brand name. Visa and JCB both have international assistance desks, but freezing the card itself goes through your issuer.
For international trips, add the embassy or consulate. The Ministry of Foreign Affairs' Tabireji service can deliver safety alerts and serve as an emergency communication channel, making it a natural complement to this list.
Domestic vs. International: What Changes
The shift from domestic to international is less about luggage volume and more about the range of advance preparation. Domestically, "wallet, phone, reservation info" covers most of it. Internationally, connectivity, travel documents, and airport logistics enter the picture.
The three things to settle first for an international trip: passport, connectivity, and insurance. Even with time remaining on your passport, many countries require three to six months of validity as noted by Japan's Ministry of Foreign Affairs. For connectivity, decide among eSIM, physical SIM, or rental Wi-Fi before departure — having a plan eliminates arrival-day anxiety. Airport arrival timing also needs more buffer internationally; the two-to-three-hour-before-departure guideline accounts for check-in, security, and immigration, which stack up faster than domestic travelers expect.
The items you pack may look similar, but internationally you are also confirming "will my phone work?", "do I meet entry requirements?", and "will my payment methods function?" Domestic trips forgive oversights because recovery is easy. International trips reward thorough pre-departure preparation, and that preparation converts directly into peace of mind. If you plan to use this checklist as a saved reference, splitting it into a domestic version and an international version and reviewing each once is enough to lighten departure-day cognitive load considerably.
Your Next Move
The surest path to a successful first solo trip is resisting the urge to think too broadly. Start by narrowing your purpose to one thing, pick a duration — day trip, one night, or two nights — and set a budget ceiling. Generate exactly three destination candidates, then compare them on seasonal fit, navigational clarity, and safety comfort. Once a destination is set, book accommodation and main transit first, then do a final review the night before and the morning of departure. Follow that sequence and preparation stays organized, anxiety stays small, and your first solo trip in Japan has every reason to go well.
Related Articles
8 Best Hitou (Hidden Onsen) in Japan: Association-Certified Picks, Basics & How to Choose
Hitou (hidden/secret onsen) refers to remote hot springs prized for their seclusion and untouched atmosphere, while meitou (renowned onsen) highlights water quality, history, and reputation. This guide first clarifies the distinction, then hand-picks 8 inns from the Japan Association of Secluded Hot Spring Inns, comparing them across water quality, atmosphere, access difficulty, and travel style (verified Feb-Mar 2026).
12 Must-Try Regional Dishes in Kyushu, Japan — A Prefecture-by-Prefecture Food Tour
Planning a food-focused trip through Kyushu? Listing local specialties by prefecture only gets you halfway there. The real trick is building your days around walkable hubs — Fukuoka's shrine approach roads, Saga's morning markets, Nagasaki's Chinatown — and slotting dishes into morning, noon, and night.
8 Regional Winter Dishes to Try in Tohoku, Japan
Tohoku's long winters have shaped some of Japan's most satisfying regional cuisine. This guide covers eight dishes worth traveling for across Aomori, Iwate, Miyagi, Akita, Yamagata, and Fukushima, from hot pots and soups to rice bowls and ceremonial fare.
10 Best Solo Onsen Trips in Japan: Quiet Inns Where You Can Truly Unwind
A satisfying solo onsen trip in Japan comes down to choosing an inn that matches how you want to spend your time, rather than chasing famous hot spring resort names. Narrow your search by room count, dining style, private baths or in-room open-air baths, solo-traveler friendliness, access, and budget, and strong candidates become remarkably clear.